Using the File Manager in Enhance
Need to upload files, edit code, or reorganise your website? The built-in File Manager has got you covered - no FTP client required!
Accessing the File Manager
- Navigate to Websites and select your domain
- Click Files in the website menu
- The File Manager will open showing your website's root directory
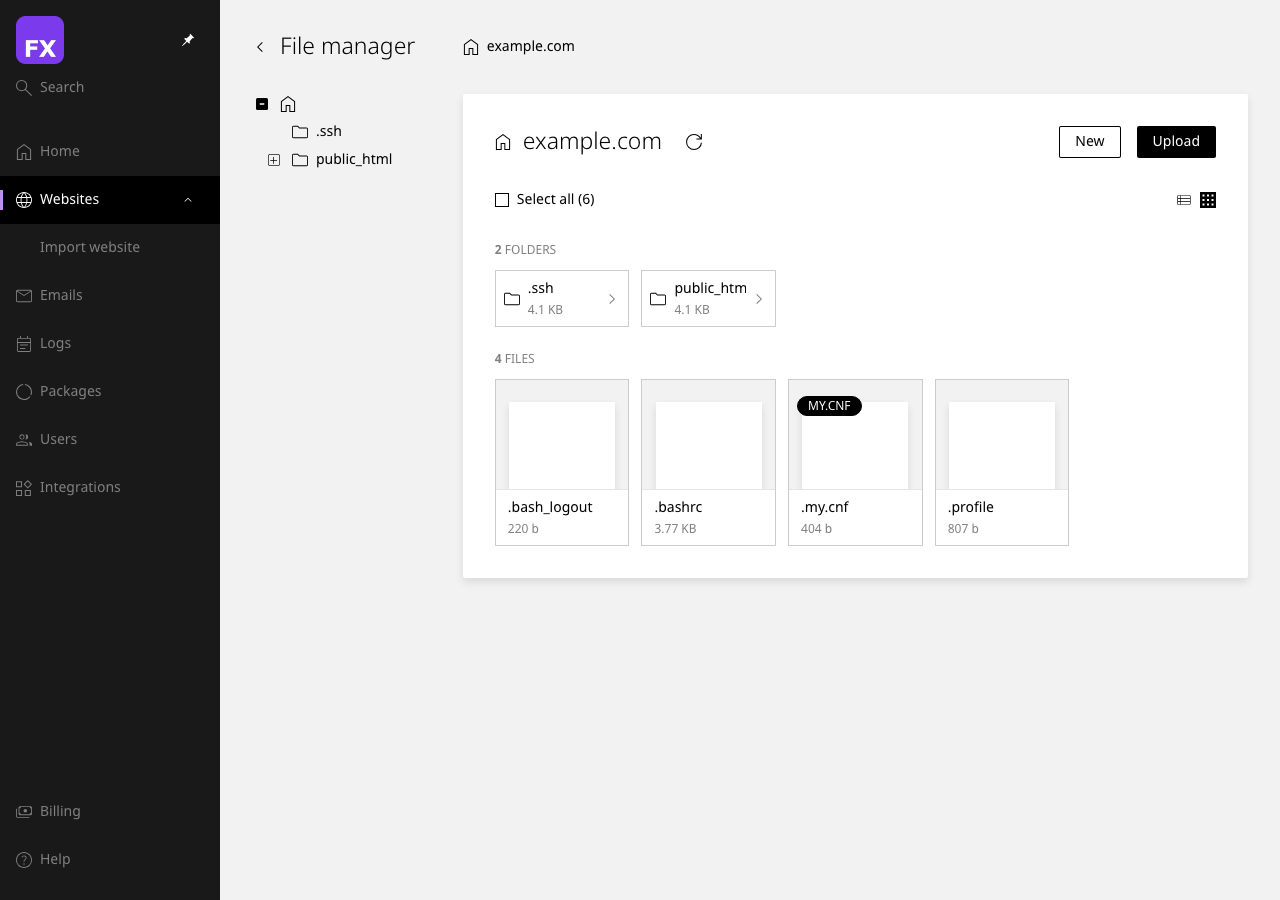
Navigating Your Files
Directory Structure
Your website files are organised like this:
/home/username/
├── public_html/        ← Your website's public files go here
│   ├── index.php
│   ├── .htaccess
│   └── wp-content/
├── logs/               ← Access and error logs
├── tmp/                ← Temporary files
└── ssl/                ← SSL certificates
Navigation Tips
- Click a folder to open it
- Breadcrumb trail at the top shows your current path - click any part to jump back
- Home icon returns you to the root directory
- Refresh button reloads the current directory
[SCREENSHOT: The breadcrumb navigation at the top of the File Manager]
Uploading Files
Single File Upload
- Navigate to your destination folder
- Click the Upload button
- Select your file(s)
- Wait for the upload to complete
[SCREENSHOT: The upload dialog with a file being dragged into it]
Drag and Drop
The quickest way to upload:
- Open File Manager to your target folder
- Drag files from your computer directly into the browser window
- Watch them upload automatically
Heads Up: Maximum file upload size is 256MB. For larger files, use FTP or SFTP.
Uploading ZIP Files
Got a whole website to upload? Upload a ZIP file and extract it:
- Upload your
.zip file
- Right-click the ZIP file
- Select Extract
- Choose the destination folder
- Click Extract
[SCREENSHOT: The context menu showing the Extract option for a ZIP file]
Creating Files and Folders
New Folder
- Click + New Folder
- Enter the folder name
- Press Enter or click Create
New File
- Click + New File
- Enter the filename (including extension, e.g.,
script.js)
- Press Enter or click Create
- The file will open in the editor for you to add content
[SCREENSHOT: The new file dialog with a filename being entered]
Editing Files
Built-in Code Editor
The File Manager includes a proper code editor with:
- Syntax highlighting for PHP, HTML, CSS, JavaScript, and more
- Line numbers
- Search and replace
- Auto-indentation
To edit a file:
- Click on the file to select it
- Click Edit in the toolbar (or double-click the file)
- Make your changes
- Click Save (or press Ctrl+S / Cmd+S)
[SCREENSHOT: The code editor with a PHP file open showing syntax highlighting]
Safety First: Always make a backup before editing important files. One wrong character in .htaccess and your site could go down faster than a lead balloon!
Managing Files
Copying Files
- Select file(s) by clicking the checkbox
- Click Copy
- Navigate to the destination
- Click Paste
Moving Files
- Select file(s)
- Click Move
- Navigate to the destination
- Click Move Here
Renaming Files
- Right-click the file
- Select Rename
- Enter the new name
- Press Enter
Deleting Files
- Select file(s) to delete
- Click Delete
- Confirm the deletion
Warning: Deleted files cannot be recovered unless you have a backup!
[SCREENSHOT: The delete confirmation dialog showing selected files]
File Permissions
Need to change file permissions? Here's how:
- Right-click the file or folder
- Select Permissions (or Change Permissions)
- Set the permission values:
- Owner - Read, Write, Execute
- Group - Read, Write, Execute
- Public - Read, Write, Execute
- Click Save
[SCREENSHOT: The permissions dialog showing the chmod checkboxes]
Common Permission Settings
| Permission |
Numeric |
Use For |
| 644 |
rw-r--r-- |
Regular files (PHP, HTML, CSS) |
| 755 |
rwxr-xr-x |
Folders and executable scripts |
| 600 |
rw------- |
Sensitive config files |
| 777 |
rwxrwxrwx |
Avoid! Security risk |
Searching for Files
Lost a file? Use the search function:
- Click the Search icon
- Enter the filename or partial match
- Press Enter
- Results will show matching files across all directories
[SCREENSHOT: The search dialog with search results displayed]
Downloading Files
Single File
- Right-click the file
- Select Download
Multiple Files or Folders
- Select multiple items using checkboxes
- Click Compress to create a ZIP
- Download the ZIP file
Next Steps: Prefer using an FTP client? Check out our FTP and SFTP Access Guide.
