Database Management in Enhance
Databases are the backbone of most modern websites - from WordPress blogs to custom web applications. Here's everything you need to know about managing your databases in Enhance.
Understanding Databases
What is a database? Think of it as a super-organised filing cabinet for your website. Instead of folders and papers, you have tables and rows of data. Your WordPress posts, WooCommerce products, and customer information all live in your database.
Enhance supports MySQL and MariaDB databases - they're essentially interchangeable for most purposes.
Creating a Database
Step-by-Step
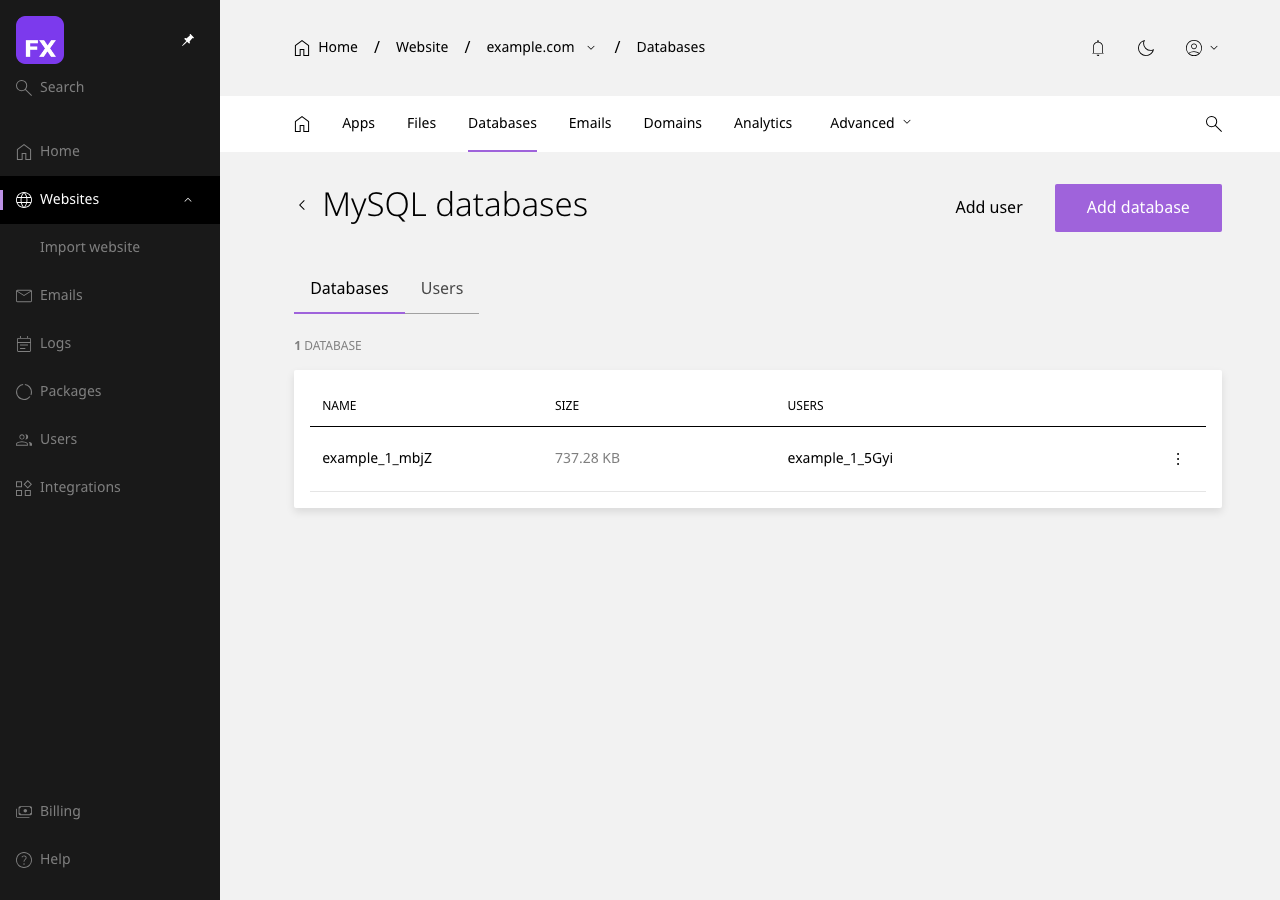
- Navigate to Websites > Your Domain > Databases
- Click + Create Database
- Enter a database name (keep it simple and descriptive)
- The database will be created instantly
[SCREENSHOT: The Create Database dialog with the database name field]
Naming Tips: Use lowercase letters, numbers, and underscores. Avoid spaces and special characters. Examples: wordpress_blog, shop_db, mysite_production.
Managing Database Users
Every database needs at least one user account to access it. Think of the database as a vault and the user as someone with the key.
Creating a Database User
- Go to Databases > Database Users
- Click + Create User
- Enter a username
- Generate or create a strong password
- Click Create
[SCREENSHOT: Create Database User form with username and password fields]
Assigning Privileges
After creating a user, assign them to a database:
- Click on the user
- Select Add Database
- Choose which database(s) they can access
- Set their permissions:
- All Privileges - Full access (recommended for your application)
- Read Only - Can view but not modify data
- Custom - Pick specific permissions
[SCREENSHOT: Database privileges assignment screen with checkboxes for different permissions]
Common Privileges Explained
| Privilege |
What It Does |
| SELECT |
Read data from tables |
| INSERT |
Add new data |
| UPDATE |
Modify existing data |
| DELETE |
Remove data |
| CREATE |
Make new tables |
| DROP |
Delete tables (dangerous!) |
| ALTER |
Modify table structure |
| INDEX |
Create/remove indexes |
Using phpMyAdmin
phpMyAdmin is a web-based tool for managing your databases without writing SQL code.
Accessing phpMyAdmin
- Go to Databases in Enhance
- Click the phpMyAdmin button (or link)
- You'll be logged in automatically
Common phpMyAdmin Tasks
Browsing Data
- Click your database name on the left
- Click a table name
- Click Browse to see the data
Running SQL Queries
- Select your database
- Click the SQL tab
- Enter your query
- Click Go
-- Example: Find all posts from 2024
SELECT * FROM wp_posts WHERE post_date LIKE '2024%';
Exporting Data
- Select your database
- Click Export
- Choose format (SQL is most common)
- Click Go to download
Importing Data
- Select your database
- Click Import
- Choose your SQL file
- Click Go
[SCREENSHOT: phpMyAdmin import screen with file selection and options]
Backing Up Databases
Manual Backup via phpMyAdmin
- Open phpMyAdmin
- Select your database
- Click Export
- Choose Quick method and SQL format
- Click Go
- Save the downloaded
.sql file somewhere safe
Automated Backups
Enhance can automatically backup your databases. See our Backup Guide for details.
Restoring a Database
From a Backup File
- Open phpMyAdmin
- Create a new empty database (or use existing)
- Select the database
- Click Import
- Choose your
.sql backup file
- Click Go
Warning: Importing into an existing database with data will add to (not replace) the existing data unless your backup includes DROP TABLE statements.
Restoring from Enhance Backups
If you've got Enhance backups enabled:
- Go to Backups
- Find the backup you want
- Select Restore Database
- Choose which database to restore
- Confirm the restoration
Database Troubleshooting
"Error Establishing Database Connection"
This dreaded message usually means:
- Wrong credentials - Check your database name, username, and password in your website's config file (e.g.,
wp-config.php for WordPress)
- Database doesn't exist - Verify the database is created in Enhance
- User lacks permissions - Check the user is assigned to the database with proper privileges
- Database server issues - Rare, but check our status page
"Access Denied for User"
- Verify the username and password are correct
- Check the user has privileges on the specific database
- Make sure you're using the correct host (usually
localhost)
"Table Doesn't Exist"
- The table may have been deleted or never created
- Check you're connecting to the right database
- You may need to restore from a backup
Database Running Slowly
- Add indexes to frequently searched columns
- Optimise tables via phpMyAdmin (Operations > Optimize table)
- Consider upgrading your hosting plan for more resources
- Review your queries for inefficiencies
Database Security Best Practices
- Strong Passwords - Use randomly generated passwords for database users
- Principle of Least Privilege - Only grant permissions that are actually needed
- Regular Backups - You can never have too many backups
- Keep Software Updated - Outdated CMS software is a common attack vector
- Don't Use 'root' - Create specific users for specific purposes
Connecting from External Applications
Need to connect to your database from outside your hosting? You'll need to enable remote database access:
- Go to Databases > Remote Access
- Add your IP address (or IP range)
- Save changes
The connection details:
| Setting |
Value |
| Host |
Your server's IP or hostname |
| Port |
3306 |
| Database |
Your database name |
| Username |
Your database username |
| Password |
Your database password |
Security Note: Only enable remote access if you absolutely need it, and restrict it to specific IP addresses.
Next Steps: Want to manage your domain's DNS? Check out our DNS Management Guide.
