Email Management in Enhance
Nothing says "professional" quite like a custom email address at your own domain. Let's get you set up with email that actually works!
Creating Email Accounts
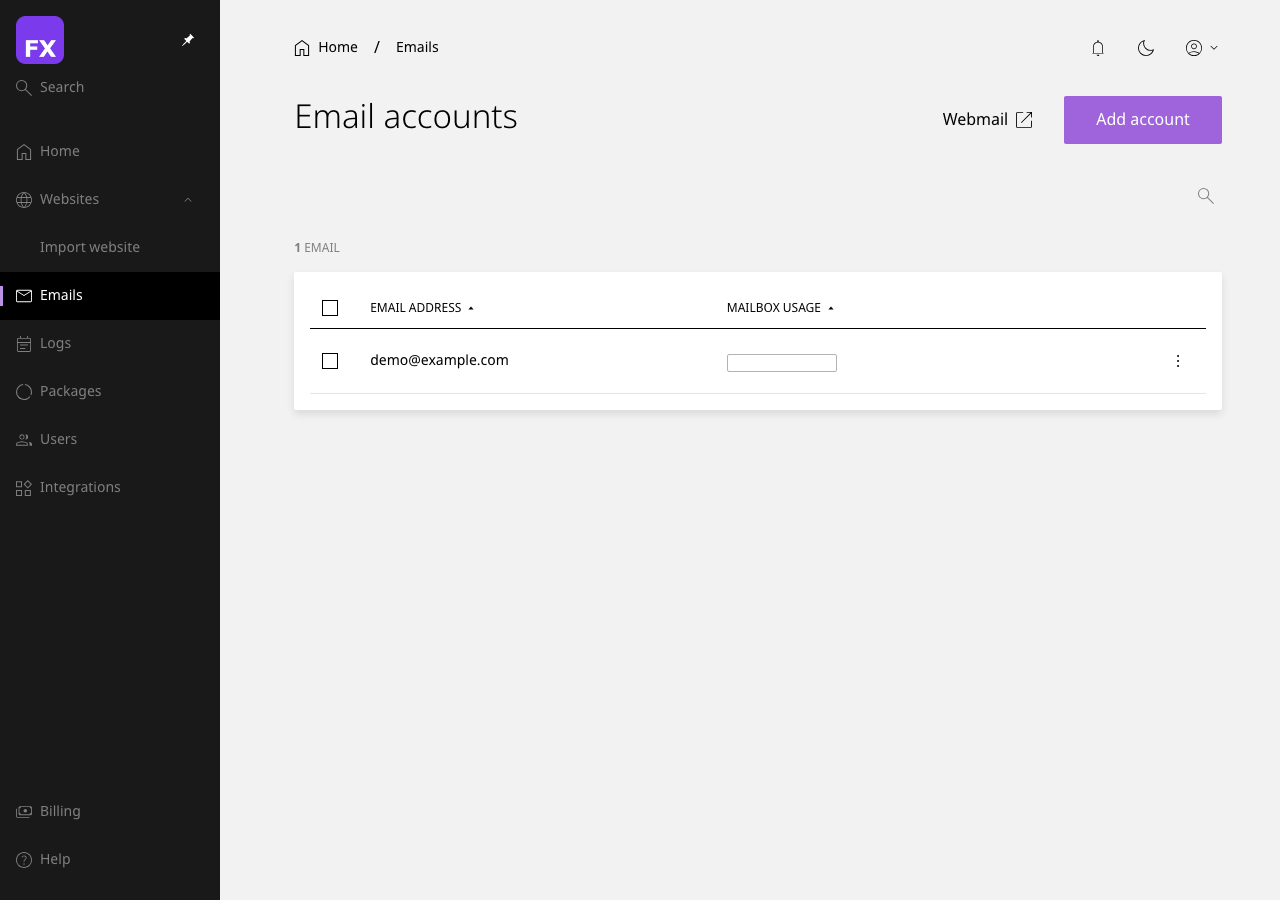
Adding Your First Email Account
- Navigate to Email in the sidebar (or select your website and click Email)
- Click + Create Email Account
- Enter the details:
- Email Address: The part before the @ (e.g.,
hello)
- Password: A strong, secure password
- Mailbox Quota: How much storage space to allocate
- Click Create Account
Naming Ideas: Common professional email addresses include hello@, info@, support@, sales@, and of course, your name like john@yourdomain.com.
Email Account Settings
Click on any email account to manage its settings:
- Change Password - Update the mailbox password
- Adjust Quota - Increase or decrease storage space
- View Usage - See how much space is being used
- Delete Account - Remove the mailbox (this deletes all emails!)
[SCREENSHOT: Email account details page showing usage statistics and options]
Accessing Your Email
Webmail (Browser-Based)
The quickest way to check your email:
- Navigate to your webmail URL (usually
https://webmail.yourdomain.com)
- Enter your full email address and password
- Choose your preferred webmail client (if options are available)
[SCREENSHOT: The webmail login page]
Email Client Setup (Desktop/Mobile)
For the best experience, set up your email in a dedicated client like Outlook, Apple Mail, or Thunderbird.
Incoming Mail Settings (IMAP - Recommended)
| Setting |
Value |
| Server |
mail.yourdomain.com |
| Port |
993 |
| Security |
SSL/TLS |
| Username |
Your full email address |
| Password |
Your email password |
Outgoing Mail Settings (SMTP)
| Setting |
Value |
| Server |
mail.yourdomain.com |
| Port |
465 (SSL) or 587 (TLS) |
| Security |
SSL/TLS |
| Authentication |
Required |
| Username |
Your full email address |
| Password |
Your email password |
[SCREENSHOT: Email client setup showing IMAP and SMTP settings]
IMAP vs POP3: We recommend IMAP as it syncs your emails across all devices. POP3 downloads emails and removes them from the server, which can cause headaches if you check email on multiple devices.
Mobile Setup Quick Links
- iPhone/iPad: Settings > Mail > Accounts > Add Account > Other
- Android: Open your email app > Add Account > Other/IMAP
- Gmail App: Settings > Add Account > Other
Email Forwarders
Want emails sent to sales@yourdomain.com to land in your personal inbox? Set up a forwarder!
Creating a Forwarder
- Go to Email > Forwarders
- Click + Add Forwarder
- Enter the address to forward FROM (e.g.,
sales)
- Enter the destination email address
- Click Create
[SCREENSHOT: The email forwarder creation form]
Catch-All Forwarding
Want to receive emails sent to ANY address at your domain (even typos)?
- Go to Email > Forwarders
- Create a forwarder with
* as the address
- Set your destination email
Spam Warning: Catch-all addresses tend to receive a lot of spam since spammers often try random addresses. Use with caution!
Email Aliases
An alias is another address that delivers to the same mailbox:
- Click on an email account
- Go to Aliases
- Add alternative addresses (e.g.,
john.smith@ and jsmith@ both going to john@)
Auto-Responders
Going on holiday? Set up an automatic reply:
- Go to your email account settings
- Click Auto-Responder or Vacation Reply
- Enable the auto-responder
- Set your:
- Subject: e.g., "Out of Office"
- Message: Your away message
- Start/End Date: When to activate/deactivate
- Save your settings
[SCREENSHOT: Auto-responder configuration with subject, message, and date fields]
Spam Filtering
Enhance includes robust spam protection to keep your inbox clean.
Spam Filter Settings
- Go to Email > Spam Filters (or your email account settings)
- Adjust the spam sensitivity:
- Low: Only catches obvious spam (might let some through)
- Medium: Balanced approach (recommended)
- High: Aggressive filtering (might catch legitimate emails)
[SCREENSHOT: Spam filter settings with sensitivity slider]
Whitelisting and Blacklisting
- Whitelist: Always allow emails from specific addresses
- Blacklist: Always block emails from specific addresses
Email Troubleshooting
"Emails Not Sending"
- Check your SMTP settings (server, port, authentication)
- Make sure your password is correct
- Verify your account isn't suspended
- Check if your ISP blocks port 25 (use 587 instead)
"Emails Going to Spam"
- Set up SPF, DKIM, and DMARC records (see our DNS guide)
- Avoid spammy words in subject lines
- Don't send from a brand new domain to thousands of people
"Not Receiving Emails"
- Check your spam/junk folder
- Verify MX records are pointing to our servers
- Check your mailbox isn't full
- Make sure the sender's email isn't bouncing
"Forgot Password"
- Log into Enhance
- Go to your email account
- Click Change Password
- Set a new password
Next Steps: Need to manage your databases? Check out our Database Management Guide.
